

Create Your Account
Signing up for Malovex is self-serve — there’s no approval queue and no waiting. Create your workspace, pick a plan, and you’re in.
Ready now? Create your Malovex account →
Sign up
Section titled “Sign up”-
Go to the Malovex sign-up page and open Register.
-
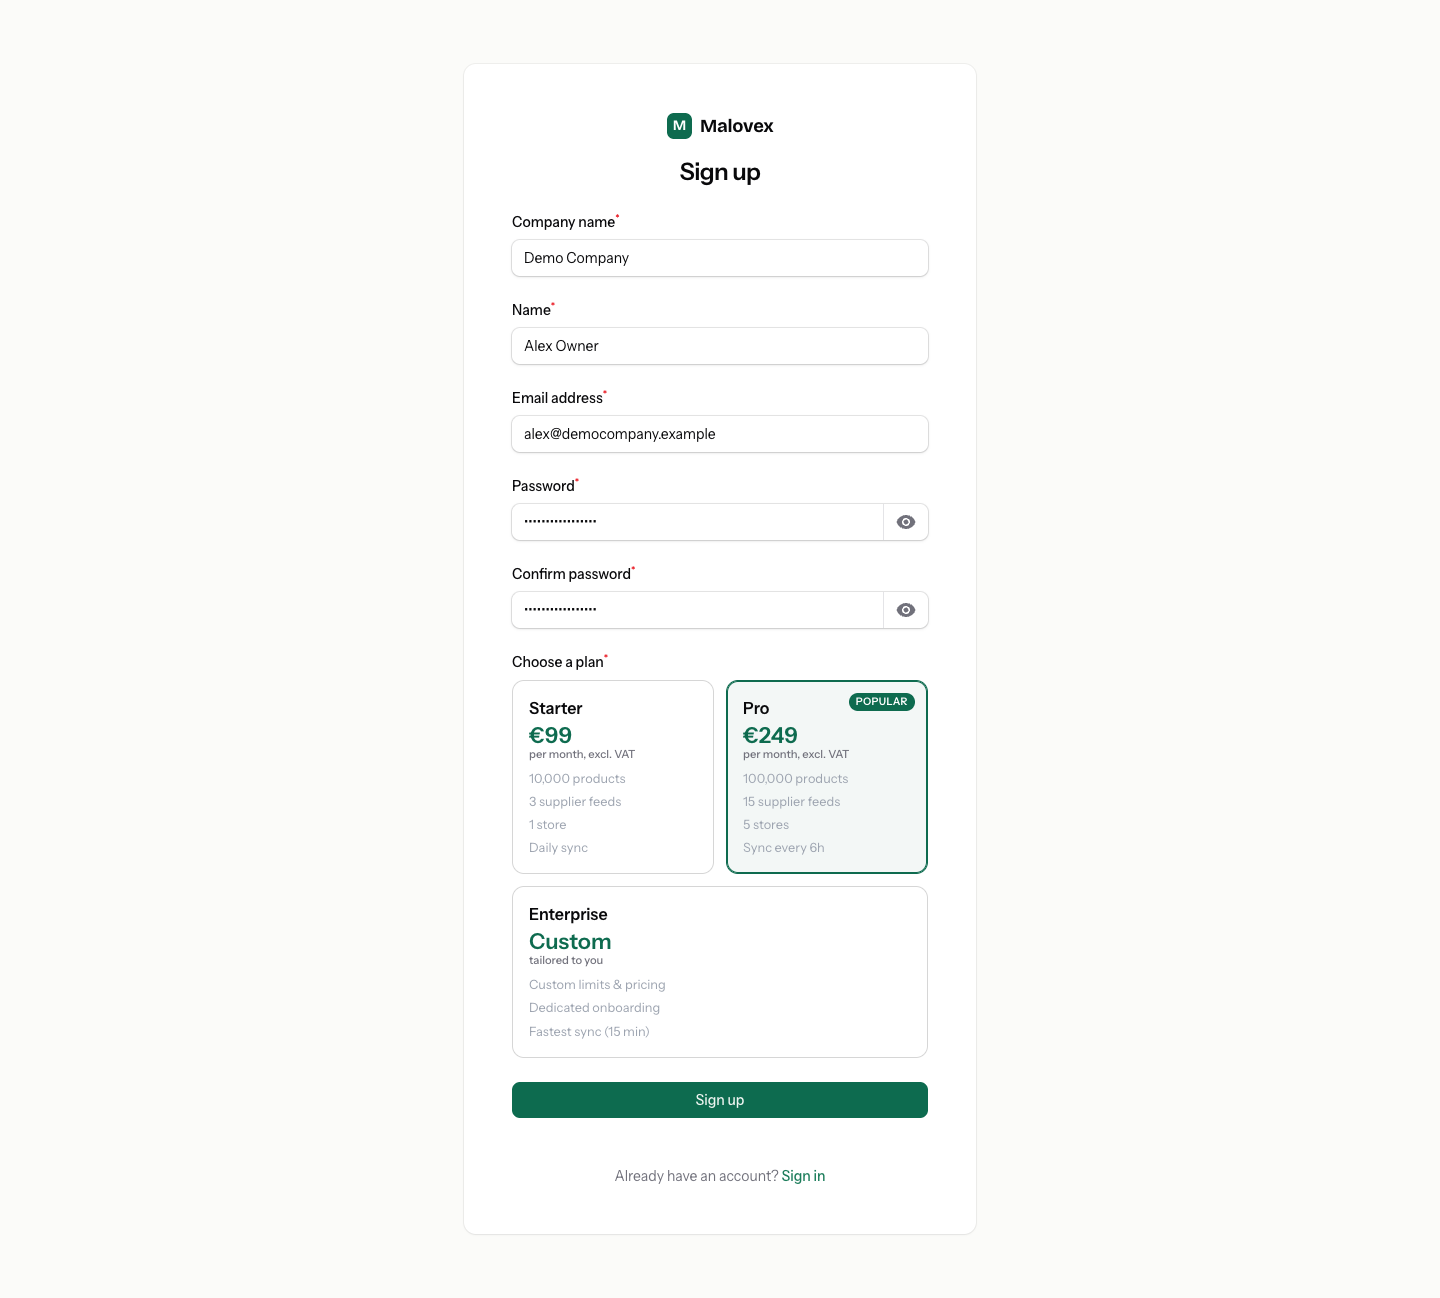
Fill in the registration form:
- Company name — the name of your business (for example, “Demo Company”). This becomes your workspace name.
- Name — your own full name.
- Email — your work email. This is the address you’ll sign in with.
- Password — and confirm it.
-
Choose a plan. Pick Starter, Pro, or Enterprise from the plan cards. Each card shows the headline price and key limits (products, supplier feeds, stores, and sync frequency). You can change your plan later, so don’t over-think this.
-
Select Register.
The first person to sign up becomes the workspace Owner with full access. You can invite team members and grant them specific permissions afterwards — see Users, roles & permissions.
What happens after you register
Section titled “What happens after you register”What comes next depends on the plan you picked:
- Starter or Pro. You’re taken straight to secure checkout to add a payment method. Starter includes a 7-day free trial, so you won’t be charged until the trial ends; Pro is charged when you confirm. Once payment is set up, you land in your workspace.
- Enterprise. Your account is created in a pending state and our team is notified to reach out and tailor your plan. In the meantime you can start on Starter or Pro from the Billing & Usage page.
Verify your email
Section titled “Verify your email”After signing up, Malovex sends a verification link to your email address. Verifying is encouraged but doesn’t block access — you can start working right away and confirm your email when it’s convenient.
Your workspace is ready
Section titled “Your workspace is ready”A default store is created for you automatically at sign-up, so you have somewhere to publish from immediately. From here, head to the First steps checklist to connect your first supplier and get your catalog flowing.